How to install the LUDI (Lift-Up Drive-In) Platform Scale: OPTION 1
What you will need for this installation:
- Drill (Hilti is recommended)

- A spanner set
- Gloves
- Drill Piece (M12SDS)
- Hammer
- Rachet (17ml socket
- Hoover to hand
- Make sure that the area for installation is clear, flat and clean.
- Take the LUDI out of the packaging and place it into the area you are planning to install.
- Mark the outside holes on the frame.
- When all holes on the frame are marked, move the LUDI out of the way, in order to drill holes in place.
- Drill the holes (Our Engineer Chris recommends using a Hilti drill ) Top Tip: Have a hoover to hand, this will come in handy when cleaning up the mess from drilling and cleaning out the holes.
- Once the holes are drilled, move the LUDI back in place, insert raw plugs and bolt the scale to the floor.
- Manually lift the LUDI, ask for an extra pair of hands to hold the scale and mark the last 2 bolt holes.
- Lower the scale back down, unbolt and move so that you can drill the remaining holes.
- Drill the remaining holes, clean, return the frame and bolt down.
- Manually lift the LUDI, ask for an extra pair of hands to hold the scale whilst you install the rams and locking mechanism. When the scale is in the upright position and in the lock, position fit the remaining 2 bolts.
- Add the ramp locating plates, place the LUDI into the cupped grooves on the plate.
- Place the ramp over the locating pin.
- Once you are happy, mark the final holes and drill.
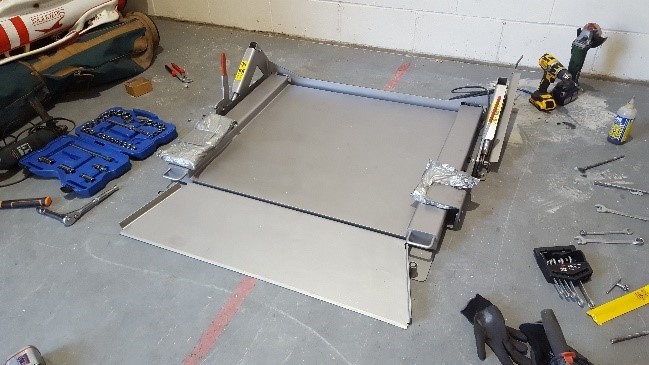
Your LUDI should now look like the image below.
How to install the LUDI (Lift-Up Drive-In) Platform Scale: OPTION 2
What you will need for this installation:
- Drill (Hilti is recommended)
- A spanner set
- Gloves
- Drill piece (M12SDS)
- Hammer
- Rachet (17ml socket)
- Hoover to hand
- Make sure that the area for installation is clear, flat and clean.
- Take the LUDI out of the packaging and place into the area where you are installing it.
- Remove the scale from the frame, by removing the plates that go through the handle at the rear of the scale. Then you need to manhandle the scale base out of the frame.
- Mark the outside holes on the frame.
- When all holes on the frame are marked, move the LUDI out the way.
- Drill the holes (Our Engineer Chris recommends using a Hilti drill) Top Tip: Have a hoover to hand, this will come in handy when cleaning up the mess from drilling and cleaning holes.
- Once holes are drilled, move the LUDI back in place, insert raw plugs and bolt the scale to the floor.
- Replace the scale base back into the frame, secure the plates that go through the handle.
- Manually lift the LUDI, ask for an extra pair of hands to hold the scale whilst you install the rams and locking mechanism.
- Add the ramp locating plates, place the LUDI into cupped grooves on the plate.
- Place the ramp over the locating pin.
- Once you are happy, mark the final holes and drill.
Your LUDI should now look like the image below.
Operation and Setup Instructions of the VW Axlemate
- Place the weigh pad carefully on flat smooth ground and press the ON/OFF key.
.jpg)
- The LCD screen displays "0"kg indicating the pad is in weighing mode.
- The LCD screen displays the weight of the item/wheel on the weigh pad.
- The LCD screen returns to zero automatically after an item/vehicle leaves the weigh pad, if there is still weight shown press the ZERO key.
- If the pad sees no weight for 10 minutes it will automatically switch off, it is also possible to shut down manually using the ON/OFF key.
General Notes:
- Fully charge the pad before use
- Do not leave charger connected to pad after charging has completed
- The average battery life is approx 16 hours
- Ensure the pad is at "0" after switching on, press the ZERO key if required
- When the battery is low the screen will show "LO", please charge the battery
How to turn off the weight server on Cardinal 825
- Exit the application that is running by pressing the left arrow/triangle button.
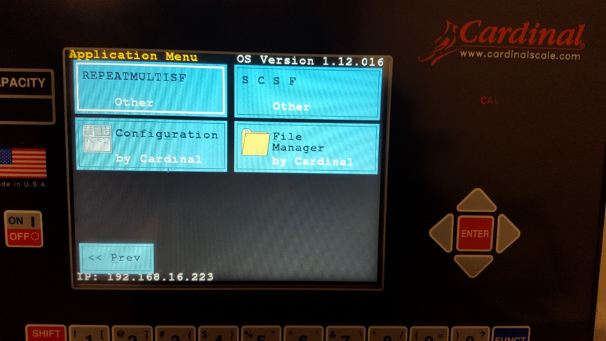
- Type in (your password) for the code to exit and you should see something like the picture below.
3. Press the configuration button, you should now see this screen.
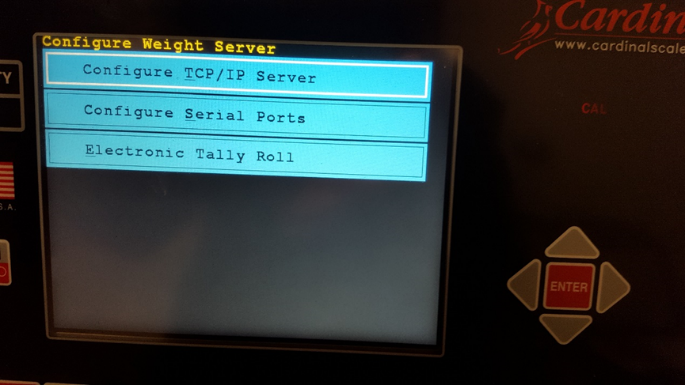
4. Press the configure weight server button.
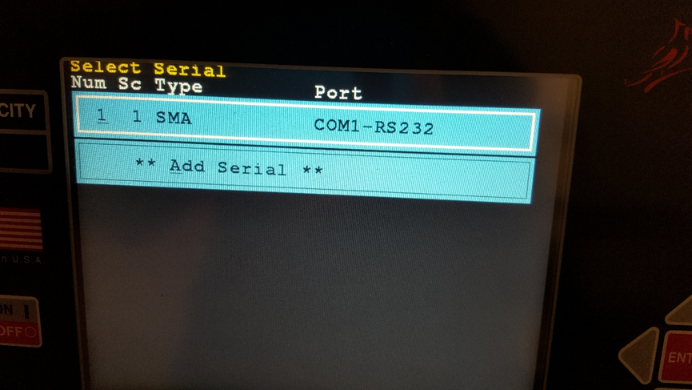
5. Press the configure serial ports button.
6. Click onto No1 Com1.
7. On the first line of the next screen you will see enable, change this to NO by using the space bar.
8. Once this has been changed press the right arrow/triangle until you see restart weight server NO, you need to change this to YES by pressing the space button and then press enter.
9. Press the right arrow/triangle button once and you should now see the AW2013 application button.
10. Press on this button to restart the program.
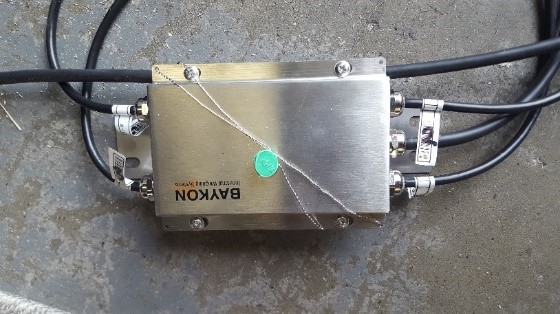
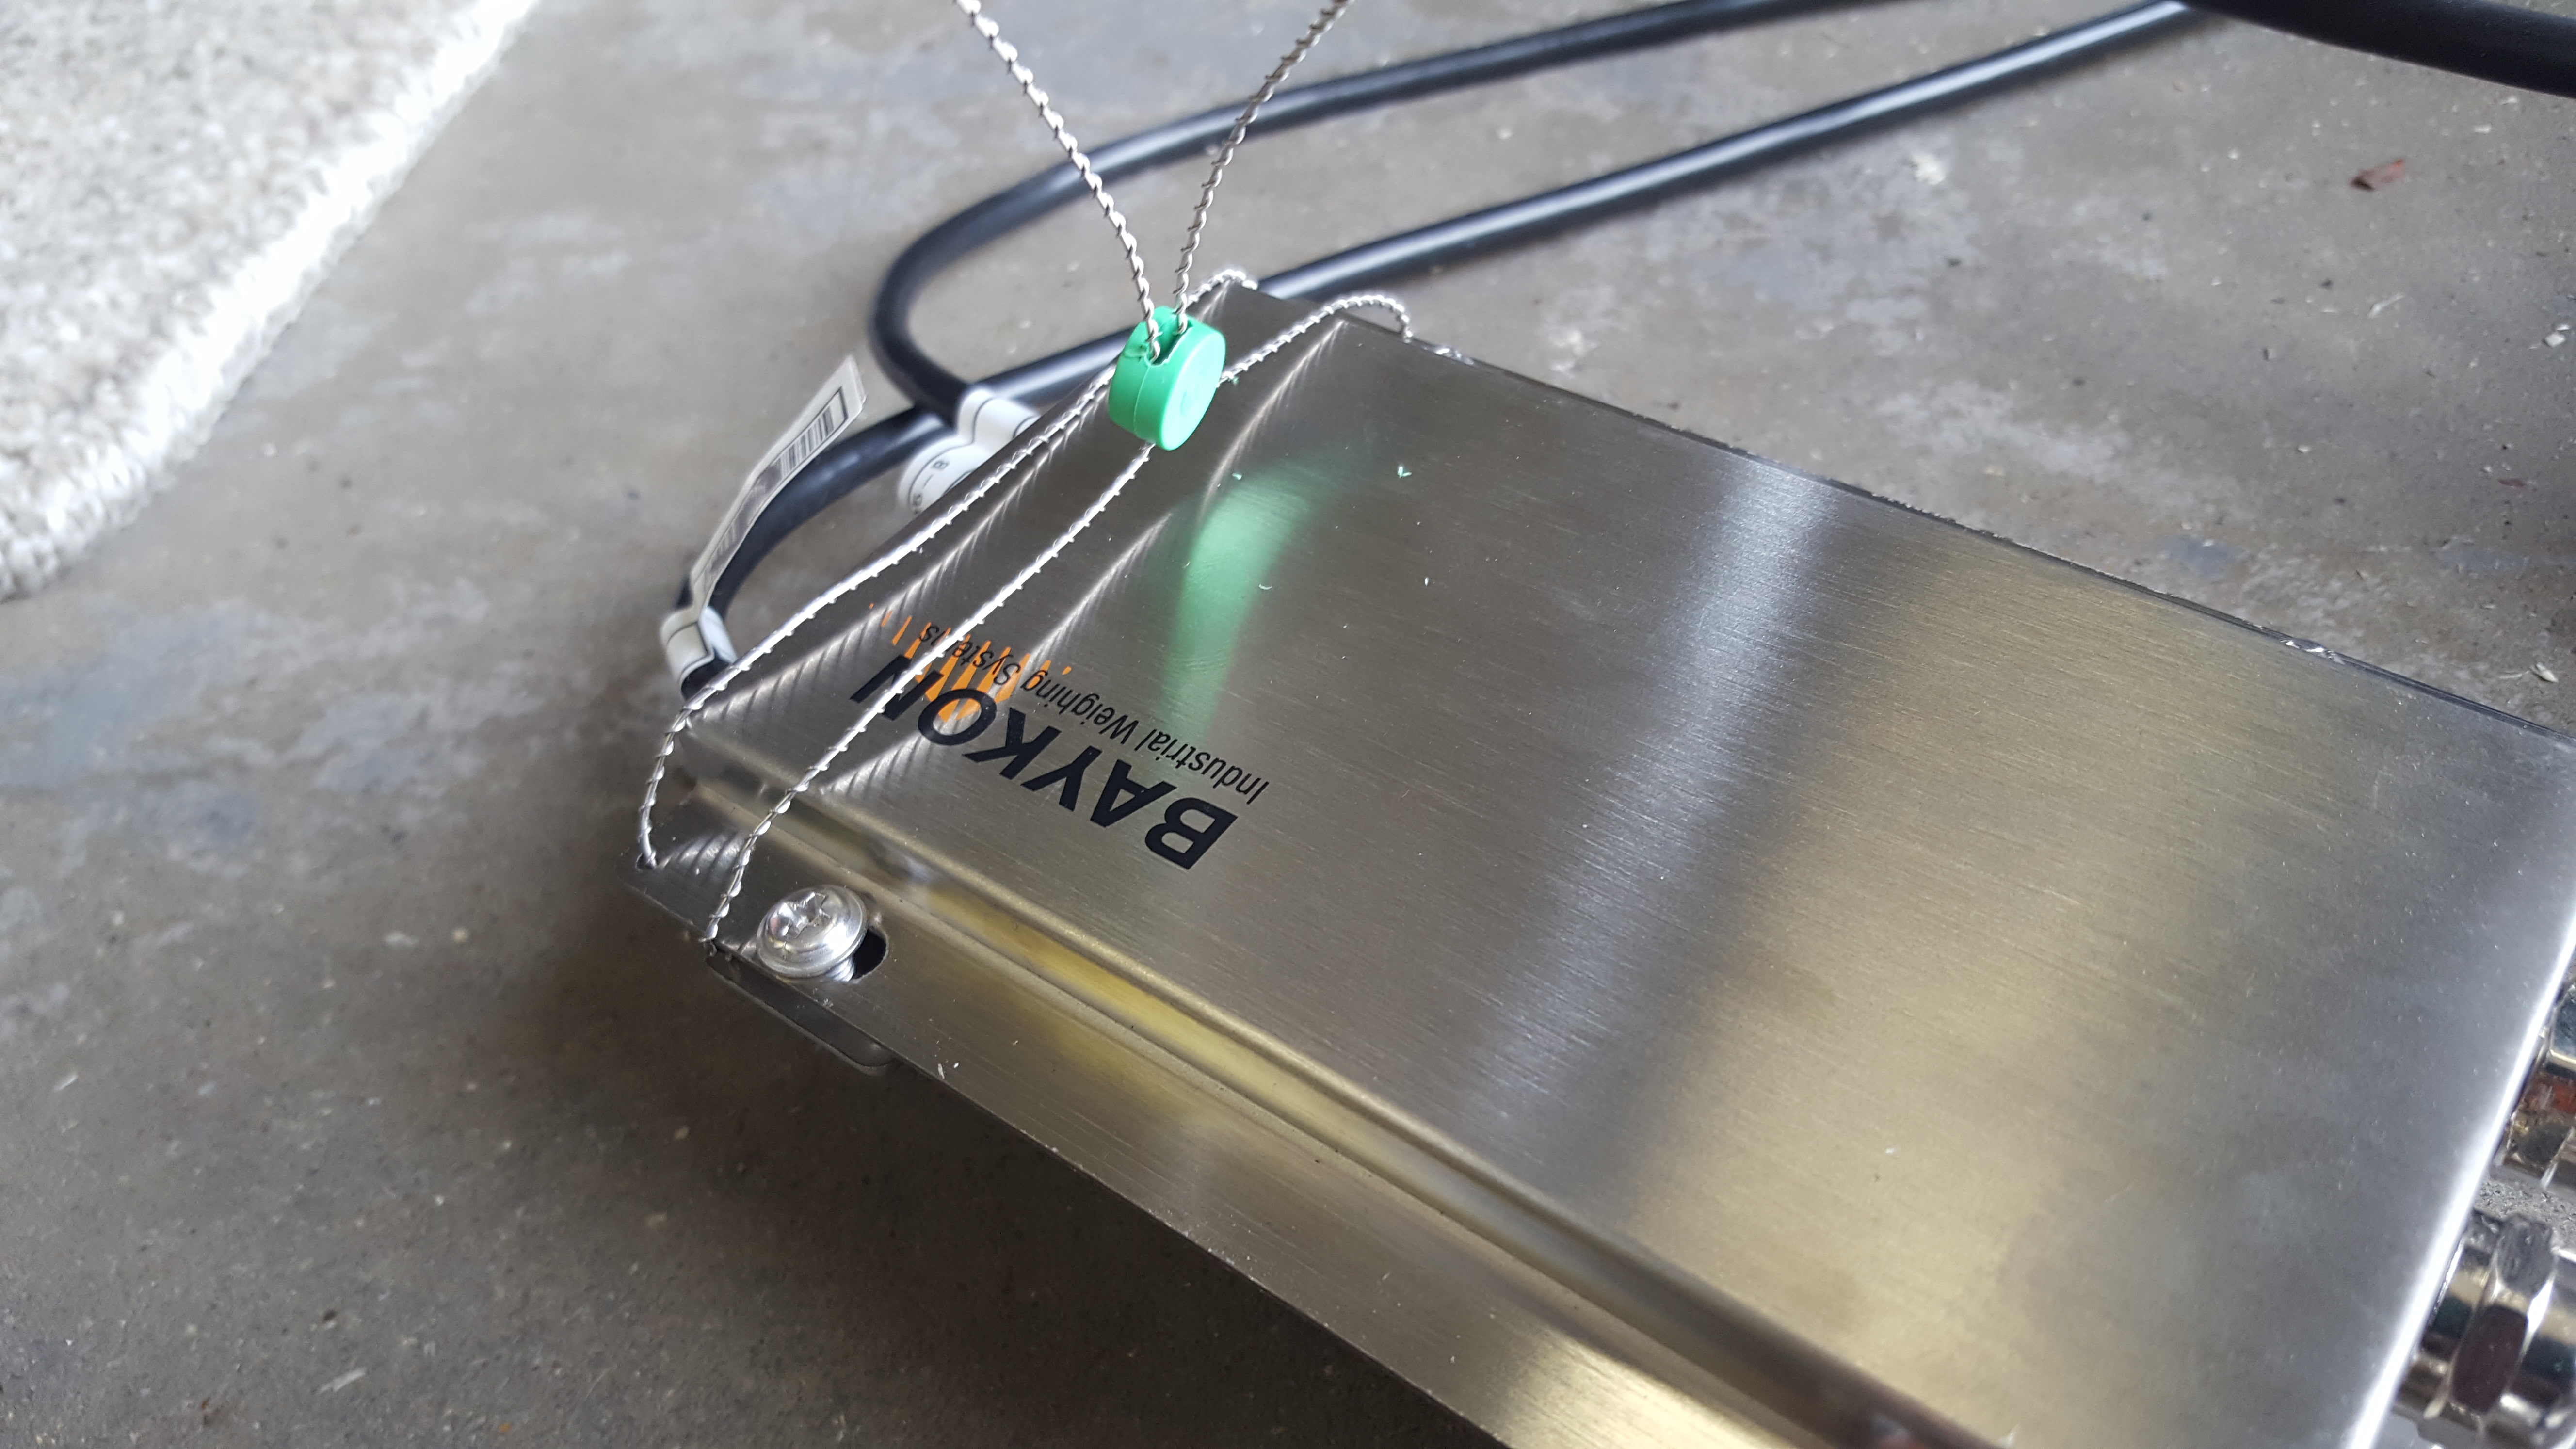
Tech Tip! How to seal a junction box correctly (BJS04G)
What you will need:
- Sealing Wire
- Plastic Seals
- Sealing Tool
- Make sure you put the sealing wire DIAGONALLY across the junction box
- Add the seal onto both ends of the sealing wire
- Press down firmly with the sealing tool
- Your junction box should now look like the image shown below
This is the correct way to seal a junction box.
This is the incorrect way to seal a junction box.
Why must you seal a Junction Box Correctly?
You must always wire/seal a junction box diagonally because it prevents customers from breaking into the casing and fiddling with the components inside. Whereas if you only wire/seal the box at one end, this could cause the casing to be opened and components could be exposed to being damaged.
If there is anything you would like to see in our future Tech Topics, please don't hesitate to contact: sophia@awmltd.com.